Friday 14 March 2014

Functional Testing Starling Applications with Cucumber and Melomel Redux - Part 3

What happened last week,

It's been a while since I posted part 2 of the series and for that I apologise, we have been busy working on the testing framework and also integrating unit tests into the application which I will cover in tutorial sometime.

When I wrote the first two posts we were just starting to use the framework to test our app, Anu our test automation engineer most certainly hates me now as she has spent quite a while writing functional tests but I hope now we have everything written and the tests are running when the application builds on the CI server the pain she must suffer with manual testing each release is about over.

Our application as show below was built for mobile and desktop environments,


Because it was intended to be displayed on multiple devices testing could be a real pain, automation testing allows us to test automatically on multiple display resolutions and check the outcome is correct.

As I discussed previously we decided we were going to use a Behavioural Based method for our functional tests.  Normally these would be written as part of the development process but we were bad developers and did not do this so it was an arduous task to write them after development had completed.  The tool we use for most of our BDD is Cucumber (http://cukes.info/), we use this for testing native iOS, Android, APIs and anything else we can find.  The benefits of this tool is the language Gherkin (https://github.com/cucumber/cucumber/wiki/Gherkin).  This is plain english and should tie pretty close to your agile features.

Thankfully we are only going to be testing the starling demo project however this is more than complicated to get your feet wet.


Lets look at how we can test this using BDD first we are going to write a feature that describes an element of the functionality.

Consider the following example...

Feature:
When the user clicks on the benchmarks button they should see a screen which allows them to test the performance of the framework.

Scenario:
Given I am on the main screen
And I can see the "Benchmarks" button
When I click the "Benchmarks" button
Then I expect to see a button with the text "Start benchmark"

The above should be understandable by the guys in the suits, in fact we actively encourage them to write these features.  It should also be understandable by the guys in the T-shirts as we are the people who will be making this a reality.

Using Cucumber and Melomel allow us to automate our starling application, we can turn the above text into clicks and  swipes.  This way we can write our tests before our code give ourselves a repeatable method for testing our feature.

Ok boring stuff over tech stuff time.

I am assuming you have followed the previous post part 2 which describes the build process and what is needed to get going.  If not head on over there now (http://ttmmhe.blogspot.co.uk/2014/01/functional-testing-starling_15.html)

Go to the folder where you cloned the example project and update the repository, it has been a couple of months since I wrote the last post so I will most definitely have updated some stuff.  You can do this by executing the command.

git pull

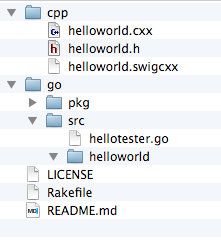
You will see a directory structure which should look like the below:

Also update the gems in the project by executing the ruby command "bundle" from the command line.

bundle

Enable Melomel in Starling

To enable melomel we must reference the melomel.swc in our project then all we need to do is to call the below methods passing a reference to our starling stage.

Melomel.stage = new StarlingStage(stage);
Melomel.connect();

Cucumber Structure

Cucumber requires several folders and files in order to run, there is the main "features" folder this contains all your feature files and code to run the tests.  The "step_definitions" which contains the code matching your plain english feature steps and a "support" folder which contains well support code and files.

Feature Files

Feature files are plain text files which describe the stuff your application should do just like we looked at earlier.  Cucumber parses these files and attempts to match them to ruby functions stored in the  step_definitions files.

Step Definition Files

The step definition files contain code that matches the feature step, cucumber uses regex to parse the ruby functions and when it finds a match it will execute the code.  This way you can write multiple features that re-use step definitions.

Consider the below step:

"Given I am on the main screen"

This would match the below ruby function:

Given /^I am on the main screen$/ do
  menuScene = Melomel.wait_until_visible("MainMenu", nil, nil)
  menuScene.should_not be_nil
end

What this method is doing is calling the wait_until_visible method on melomel this searches our starling application and returns the first instance of "MainMenu" class.  There are also optional properties and a root class to refine your search.

If a visible instance of "MainMenu" is not present in the application an error is thrown.  We can also use rspec to assert that the object is not nil.

Lets look at another example, this time we are going to find a button which has a particular text.  In cucumber we can write a generic step that will match multiple feature steps.

"And I can see the "Benchmark" button"

This would match the ruby function:

Given /^I can see the "([^"]*)" button$/ do |arg1|
  button = Melomel.find!("starling.display.Button", nil, :text => arg1)
  button.should_not be_nil
end

This time we are using the standard Melomel.find method, this does not wait for an object to be displayed it assumes that it is already present.  We also are using regular expression instead of the direct text reference.  This way we can re-use the step for multiple buttons.

Lastly here is an example to show how we can touch a button

When /^I touch the "([^"]*)" button$/ do |arg1|
  button = Melomel.find!("starling.display.Button", nil, :text => arg1)
  button.should_not be_nil
  Melomel.touch(button)
end

Thats really all there is to it, we can build up our features before we start creating our code and in a nice test first manner watch the tests fail then slowly start to pass.

Support Files

Cucumber has a nice feature that allows us to execute an application before we run our steps, inside the 01_launch.rb file you will se the following:

Before do |scenario|
  #start the app
  @pid = Process.fork do
   flex = ENV["FLEX_HOME"]
    launchon_mobile = "#{flex}/bin/adl -profile extendedMobileDevice -screensize iPhone -XversionPlatform IOS #{Dir.pwd}/bin/Demo_Mobile-app.xml"
    exec launchon_mobile   
  end
  Melomel.connect()
end


After do |scenario|
  puts "AFTER TO SCENARIO KILL #{@pid}"
  Process.kill 9, @pid
end

at_exit do
    
end

This code starts our application in the adl and then closes it once our steps have executed.

Running the Example

So all we need to do to run our example is build it and run cucumber

rake build
cucumber

If everything has worked you should see output like the following:


Conclusion

To retro fit this testing into our existing application was a bit of a pain however we did have to modify the Melomel framework first to work with Starling.  However it has been worth it as now updates are release with much greater confidence and much less pain as the automation testing takes all the load away from testing the application.  In a future post I will explain how we have taken this application one step further by re-architecting all the existing code removing PureMVC and implementing RobotLegs so we have full unit test coverage in addition to our functional tests.

You can find all the source for Melomel on the Marks and Spencer public Github repository here:

At present there is no gem uploaded to rubygems for the starling version of melomel, we plan to upload this in the next week.

Have fun.

Using the Leap Motion controller with Adobe Air Desktop App

In this short post I am going to show you how you can use the Leap Motion controller with Adobe Air desktop applications.

As it turns out this is much easier that i originally anticipated thanks to two facts:

  1. The leap software on the desktop has a little WebSocket server running on it so you can get data from the hardware.
  2. Someone has already written a basic library to deal with the web socket data and return this as a flash event (https://github.com/slikland/LeapMotionAIR/).


I have created a simple example project which you can get from my Github repository here....
https://github.com/nicholasjackson/LeapAir


The first thing we need to do is to connect to the server to start receiving data, the below code creates a LeapSocket and wires up the events.  The main event we are interested in is the Data event, the leap motion periodically updates this with the current state of the device such as hand and finger positions.


    public function LeapTest() {

        var leapSocket:LeapSocket = new LeapSocket();
        leapSocket.addEventListener(Event.CONNECT, socketConnect);
        leapSocket.addEventListener(Event.CLOSE, close);
        leapSocket.addEventListener(IOErrorEvent.IO_ERROR, error);
        leapSocket.addEventListener(SecurityErrorEvent.SECURITY_ERROR, error);
        leapSocket.addEventListener(LeapEvent.DATA, leapData);

        leapSocket.connect("127.0.0.1", 6437);

        _hand = new Hand();
        _hand.visible = false;
        addChild(_hand);
    }

Also in this event we are going to create a simple sprite which is a white circle, this will mark the position of our hand.

Lets have a quick look at the leap data event.

    private function leapData(event:LeapEvent):void
    {
        // Returns a Frame Object
        if(event.data.hands.length > 0) {

            if(!_hand.visible)
                _hand.visible = true;

            var handPos = event.data.hands[0].palmPosition;
            var interactionBox = event.data.interactionBox;
            var pos:Point = leapToScene(interactionBox,handPos);

            _hand.x = pos.x;
            _hand.y = pos.y;

        } else {
            if(_hand.visible)
                _hand.visible = false;
        }


    }

The data payload of this event is of type object and corresponds to the Leap Javascript API for the Frame object (https://developer.leapmotion.com/documentation/cpp/api/Leap.Frame.html).

We are checking to see if there is currently a hand within the controllers view and getting the position of this hand which we then set the position of our Sprite to.  One thing to note is that the leap returns the position in Leap space not in the 2D space of your application.  The Javascript examples on the Leap developer site shows how you can convert this to view space.  The method leapToScene does this for us.


    private function leapToScene(interactionBox,leapPos):Point {
        var pos:Point = new Point();

        var left = interactionBox.center[0] - interactionBox.size[0]/2;
        var top  = interactionBox.center[1] + interactionBox.size[1]/2;
        var x = leapPos[0] - left;
        var y = leapPos[1] - top;

        x = x / interactionBox.size[0];
        y = y / interactionBox.size[0];

        x = x * 1280;
        y = y * 720;

        pos.x = x;
        pos.y = -y;

        trace("left:" + left + " top:" + top + " x:" + x + " y:" + y);

        return pos;
    }

For the speed of rapid prototyping I have just hard coded the height and width of my application here 1280x720 if this was working code I would get these from the application.

And that is it, if you run the app and place your hand within the Leaps view you will see the white circle move with the position of your hand.  It is possible to take this much further and translate these movements to a virtual mouse with click and gesture but that will have to wait for next time.

Have fun.

Sunday 23 February 2014

C++ and Go

I have been investigating the possibilities of using a C++ logic library I wrote some time ago for an iPad project with go to be used as part of a web site.  I knew that using C and go would be quite straight forward and in theory I could write C interfaces to my C++ and use this with Go but I wanted to see how Swig (http://www.swig.org/) would work as this now has Go support and in theory would generate all my Go and C++ interfaces for me.

Maybe I was just being thick but the documentation on the Swig site got me so far but not to working code, I also trawled the web to find a few posts and this got me a little further but nothing yet working.  After the usual couple of hours pulling my hair out and fighting with the compiler, success I managed to get everything working.

The below example was built using OSX however there is no reason this should not work on other platforms.  It also explains only how to do a native build, building for other platform straight from my desktop is one of the things I love about go, in theory there is no reason why this would not work for the Go part however the C++ library would most likely need to be built natively.

You will need to install swig which can be found here...
http://www.swig.org/

Step one: Setup folder structure To build our example we are going to need a folder for our C++ code and one for our Go code, I want to keep the C++ code outside of the GoPath as I will most likely be using Git submodules within my application.

For convenience you can clone my git repo (git@github.com:nicholasjackson/SwigGo.git) which sets out the folder structure as below:


Lets look at the C++ code first, this is a fairly straightforward class which has one public method returning "Hello World" as a char array.

helloworld.h
#ifndef HELLO_WORLD_H
#define HELLO_WORLD_H

class HelloWorld {
public:
 HelloWorld();
 ~HelloWorld();
 const char * getHelloWorld();
};

#endif


helloworld.cxx
#include "helloworld.h"

HelloWorld::HelloWorld(){}
HelloWorld::~HelloWorld(){}

const char * HelloWorld::getHelloWorld() {
 return "Hello World";
}


helloworld.swigcxx
%module helloworld
%{
    #include "helloworld.h" 
%}

%include "helloworld.h"


The swigcxx file above is the interesting one, what we are defining here is that we would like swig to generate for us.  This is the entry point to our C++ class, this will be accessible to go, we do not need to define all the headers only the one which contains public functions we would like to call.


hellotester.go
package main

import (
 "fmt"
 "helloworld"
)

func main() {
 fmt.Println("hello tester")
 world := helloworld.NewHelloWorld()
 fmt.Println(world.GetHelloWorld())
}

The above file is our Go code as you can see this calls a method on the helloworld package which is generated by Swig to return an interface which has our method returning the char array.

Step two: generate our code, thankfully this is nice and simple.

From terminal go to the cpp directory and execute the following commands:

swig -go -c++ -intgosize 64 helloworld.swigcxx

This tells swig to generate our code using Go as a destination language and with the C++ flag to tell it our input is C++ we also need to specify the size of int for go I am using 64bit.

g++ -c -fPIC helloworld.cxx
g++ -c -fPIC helloworld_wrap.cxx

Compile the C++ code if you are building your own library you can do this with your make file or build script, helloworld_wrap.cxx has been generated by Swig, in order for Go to call the methods on your library you need to add this file so that its contained in your shared object.

g++ -undefined suppress -flat_namespace -shared helloworld.o helloworld_wrap.o -o helloworld.so

Build your shared library and copy the helloworld.go, helloworld_gc.c to the go/src/helloworld, copy the helloworld.so file to the location of your go executable in this instance go/src/

The next step is to build our go code the first thing we need to do is to create a library with the go toolchain.  In terminal go to the go/helloworld folder and execute the following commands.

go tool 6c -I /usr/local/go/pkg/darwin_amd64 -D _64BIT helloworld_gc.c

This compiles the Swig generated code with the Go c compiler, the -I directive points to your build architecture, in this case OSX.

go tool 6g helloworld.go

Compile our helloworld.go file which was generated by Swig

go tool pack grc helloworld.a helloworld_gc.6 helloworld.6

Package the two files into a static library that we can access from our code.

go install

Install this package so that we can use it from our main code.
Finally all we need to do is to build our Go code, go back to the src folder and build the go code normally using:

go build -o hellotester

assuming all went well you should now have a hellotester executable in this folder and when you run it you should see:


Good luck and all source code is available at...

https://github.com/nicholasjackson/SwigGo

Wednesday 15 January 2014

Functional Testing Starling Applications with Cucumber and Melomel Redux - Part 2

Command Line Building

In my last post (http://ttmmhe.blogspot.co.uk/2014/01/functional-testing-starling.html) I discussed the pains of not taking a test first approach to building applications.  One of the core pieces to be successful in feature based development is to be able to consistently build and test your application, this means being able to build it almost anywhere and run your tests without the need for a developer to run the build an army of testers to manually click through it.

The first step to this is to get a build script running which could be executed on by your continuous integration server.

Thankfully there are a number of handy tools out there which you can use to create your build scripts, Ant, Maven, Gradle, Bash, Rake to name but a few, my personal preference is Rake which is ruby based, mainly as it integrates well with lots of other Ruby packages which use for testing and also its quite simple to write.

For this example I am going to use Rake and the Ruby gem ASRake which handles all our compiler commands very nicely.  It is not the purpose of this tutorial to go into the depths of Rake, the internet has many far better than I could write.

We are going to compile the demo which comes with the Starling download, other than changing a few file paths I have not modified the code at all.  All source for this example can be found at:

https://github.com/nicholasjackson/melomel_starling_example

The context of this assumes that you are using a mac or linux environment if you are using windows you will need to change the paths from / to \ however everything should still work.

Flex SDK

You are going to need a Flex SDK, I am currently using the Apache SDK 4.11 you can download this from http://flex.apache.org/ this will also install the Air SDK if you select it as an option.

ASRake requires that you set the environment variable for FLEX_HOME you can set this by executing the terminal command:
"export FLEX_HOME=/path/to/your/sdk"

Rakefile

For our build we have a few dependancies:
Ruby
ruby gem :- asrake
ruby gem :- zip

My personal preference is to use RVM (http://rvm.io/) to manage my Ruby installs and gemsets, the two files .ruby-gemset and .ruby-version let RVM know which gemset repository and version of ruby you would like to use.  Think of gemsets like workspaces, you can install all sorts of gems but they are local to that gem set so if you are working on a different project which has different dependancies there is no conflict.

There is also a file called Gemfile the contents of this are....

source 'https://rubygems.org' 

gem "cucumber", "~> 0.10.0"
gem "asrake", "~> 0.14.1"
gem "zip", "~> 2.0.2"
gem "rspec", "~> 2.14.1"

This file is used by the Ruby bundler command which will download and install the gems from the repository rubygems.org and install them for use in your gemset.  Currently we only need asrake and zip for this part of the process but it will not hurt to install the others.

From your command line execute 
"bundle"

If your system complains you do not have bundler then you may have to install it with "gem install bundler".

Now lets look at our Rakefile, at the top of the file we are defining our ASRake setup:

args = ASRake::Mxmlc.new "bin/Demo_Mobile.swf"
args.file_specs = 'src/Demo_Mobile.as'
args.target_player = 11.9
args.debug = true
args.source_path << "src"
args.library_path << "libs"
#args.external_library_path << "air/nativelibs/NativeGATracker-v2.0.4.ane"
#args.external_library_path << "air/nativelibs/NativeExtension.ane"
args.isAIR = true

current = Dir.pwd
unzipDir = "#{current}/unzippedane"

I'm going to run through this line by line but this is going to do our build.

# Create a new instance of as rake and specify the output directory for our compile binary, in this case the bin folder and Demo_Mobile.swf as a filename.
args = ASRake::Mxmlc.new "bin/Demo_Mobile.swf" 

# This line defines the path to our applications main class.
args.file_specs = 'src/Demo_Mobile.as'

# The version of player you wish to target.
args.target_player = 11.9

# Set to true to enable debug mode, false for your release builds.
args.debug = true

# Set your source path, if you have multiple source paths you can just add this line multiple times with your difference source paths.
args.source_path << "src"

# Set your library paths if you are using any pre-compiled libraries, again this can be set multiple times if you have more than one library path.
args.library_path << "libs"

# This line is commented out for our example as we are not using any native extensions however if you are then you add them like so.
#args.external_library_path << "air/nativelibs/NativeGATracker-v2.0.4.ane"

# We tell the compiler we are going to build an adobe air app
args.isAIR = true

# Set a variable to the current working directory
current = Dir.pwd

# Specify the directory to which we would unzip any ANE files should we have any
unzipDir = "#{current}/unzippedane"

Full details about the package can be found on the Github read me: (https://github.com/nexussays/ASRake)

Build Task

task :build => [args,:unzipane] do 
cp_u "src/Demo_Mobile-app.xml", "bin/"
Dir.glob("assets/*") do |folder|
cp_r folder, "bin/"
end
end

In the definition of this task the => arrow signifies that the task has a dependancy on other tasks, in this case args which is our ASRake build and unzipane which would unzip any native extension so that they can be picked up by the debugger.

By simply making a dependancy on the ASRake builder Rake will automatically invoke the execute method of args, sometimes you may only want to build your application and therefore your task would be nice an neat however in this instance we need to copy some assets which are loaded at runtime by the app.

I am not going to examine the :unzipane task as we are not using it in this example, its just there for reference should you need this.  If I get the time I will fork ASRake and add unzipping native extensions and running the build as rake tasks removing all this ugly code.

Build Our Code

This is the complex part, actually its not really all you have to do is type 
"rake build"

Hopefully you do not have an error message and you are now good to run the application.

Run the Application

I have created a rake task called run to start the Air Debug Launcher, the full settings and help can be found here (http://help.adobe.com/en_US/air/build/WSfffb011ac560372f-6fa6d7e0128cca93d31-8000.html).

The below code executes a shell command which starts the ADL.  The ADL requires certain parameters such as profile (mobile, desktop), screensize (predefined such as iPhone or custom), platform and a path to your application config xml file.  This file contains details such as the swf to start and various settings for the runtime.  Its exactly the same code that IntelliJ or Flash builder would generate for you.

flex = ENV["FLEX_HOME"]
sh "#{flex}/bin/adl -extdir #{unzipDir} -profile extendedMobileDevice -screensize iPhone -XversionPlatform IOS #{current}/bin/Demo_Mobile-app.xml"

To run the app all we have to do is execute the task run like so:
"rake run"

In our rake file you can see that run has a dependancy of build so all the build tasks would be executed before the ADL is started, this is mainly because I generally change code and forget to build then spend ages working out why my bug is still there.  If you just want run to run then remove => :build.

Hopefully now you will have the Starling demo running, the next part is to look at Melomel and how we can use it for our functional testing.


Source Download


Tuesday 14 January 2014

Functional Testing Starling Applications with Cucumber and Melomel Redux - Part 1

Background


A few months ago we decided to embark on a cross platform application for our store staff, there were three criteria which the application must meet:

1. It must be fun.
2. It must be cross platform.
3. It must be fun.

After spending some time thinking about what we wanted to do we realised that we wanted the app to feel like a game. We then had the harsh realisation that this was not going to be easy to code, in fact after running up some rough estimates of effort we realised that it was also going to be expensive to build native.

We did some research and concluded that HTML5 would not give the performance we wanted from animation on mobile platforms and that we did not really want to use Unity.   Having read a lot about Starling and the amazing cross platform performance we decided we would give this a go and started to build our stack around the Starling framework.  Both Keith and I used to be Flash programmers back in the day when Flash was still owned by Macromedia and both of us have a warm place in our hearts for ActionScript so coding in Starling should not be too alien.  Zan an Android developer who we had just recruited stupidly expressed interest in the project and having no past experience in either ActionScript or Flash was thrown straight into the deep end.  Alex an epic JavaScript developer who saw trouble a mile away was press ganged onto the project and we had our merry band.

One of the things we have been concentrating on at Marks and Spencer has been solid engineering principles, we have spend a lot of time working on Agile practices, Continuous Integration, TDD and BDD using cucumber.  Personally I have bored myself silly telling the developers about the virtues of Test First Development, how important CI is, etc, etc.

When we were putting together our stack for the app we decided that we would use Starling but we would also implement the Pure MVC framework to give us clean separation and testability.  We would write everything full TDD and we would have full automated functional testing.

Tech spike time and it did not go well, due to inexperience we battled with flex unit so dropped it, we could not work out how to test the Pure MVC components in isolation so we didn't, we could not find a functional testing frame work so we decided that our poor automation tester Anu would manually test the app, she still hates us and I don't blame her.

So in effect we decided to do everything that modern development methodology tells you not to and funnily enough we ended up in exactly the same mess that conventional test driven development is intended to avoid.

Post delivery of the app which was not a great success due to a large number of defects, these were eventually fixed but we realised that we could not continue developing in this way and had to either:

1. Change core technology to something which we can write tests for.
2. Write some testing frameworks.

We chose 2, mainly because I like Starling, and secondly because I refuse to admit I was wrong about choosing it in the first place.

Now Paul who works for us used to work for the BBC building their iPlayer application in Flex, he suggested we look at a framework called Melomel written by Ben Johnson (https://github.com/benbjohnson/melomel).  I took a look and it is indeed a very impressive framework however incompatibility between flash.display.DisplayObject and  starling.display.DisplayObject meant we could not use it.

Unless we modified it.

So we did (https://github.com/DigitalInnovation/melomel).

Melomel had not been touched for a couple of years and needed a little love so we abstracted out DisplayObject and its descendants into a common interface, modified all the tests, wrote implementations for starling objects, wrote a whole heap more tests added touch and swipe functionality and ended up with a rather nice Cucumber framework that allows us to interrogate and interact with our Starling applications.

In part two I am going to show you how to build and launch your application using a Rake not an IDE and get your initial cucumber framework setup.